
Last Updated on April 27, 2024 by Ali Hamza
Ghost Rider drawing
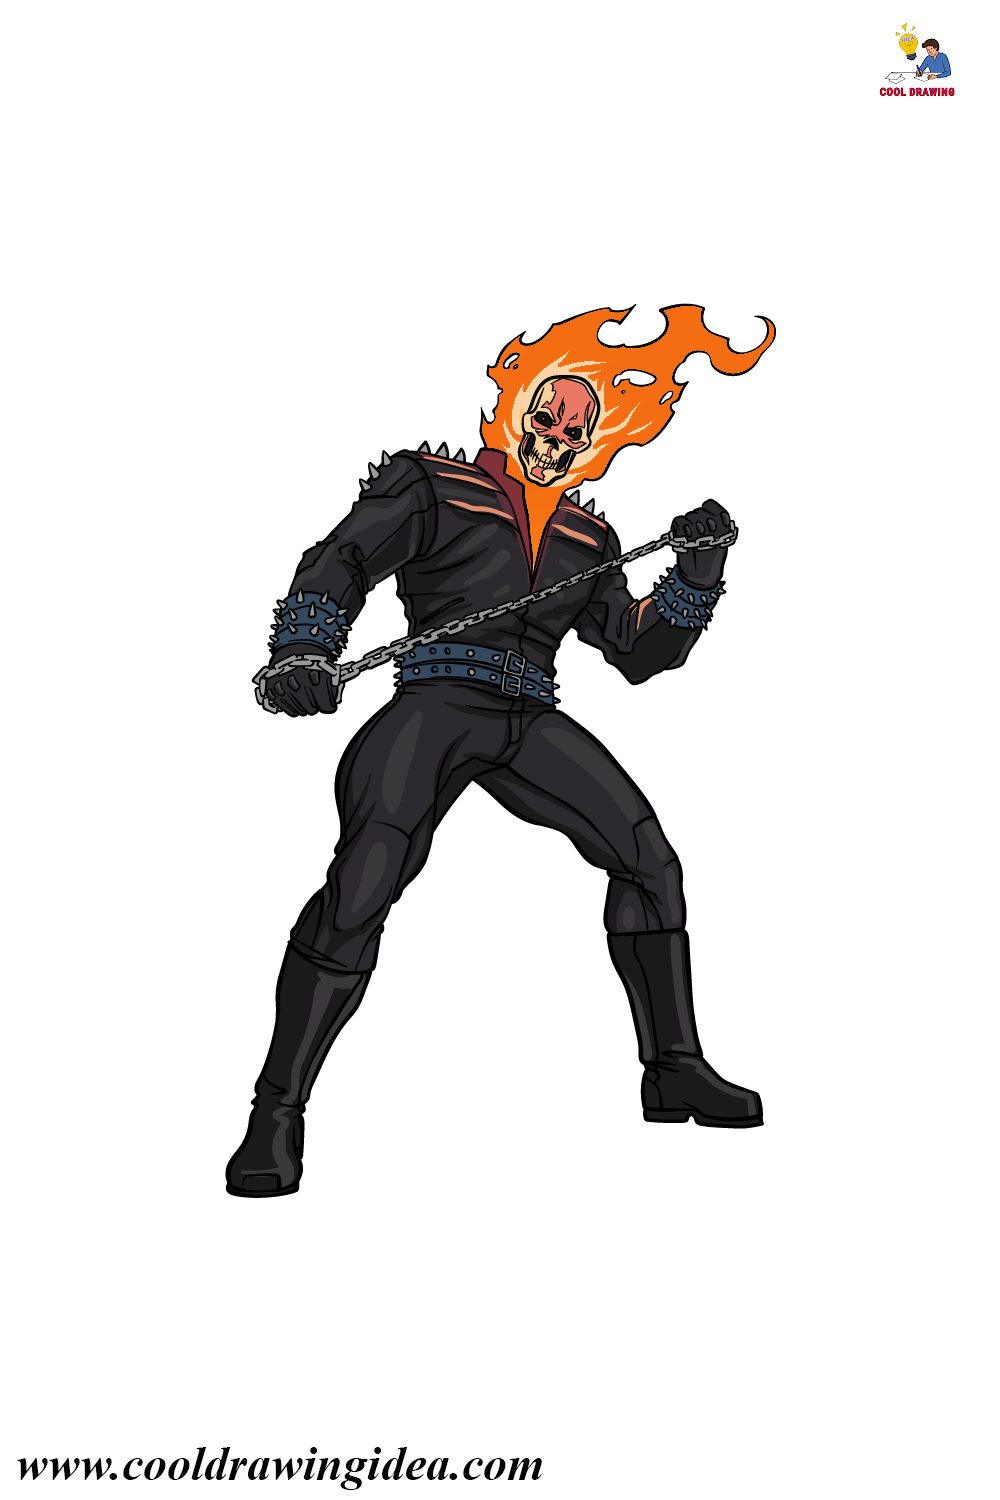
There are numerous noteworthy characters from comic book history, yet of this large number of legends and antiheroes, Ghost Rider must be one of the most exceptional! This wannabe character has a flaming skull for a head and rides his unique blazing bike as he pursues his foes. Ghost rider & cute drawings idea for every drawing lover.
This wonderful plan and his complex origin story have made him famous. And by figuring out how to draw Phantom Rider, many fans can make some extraordinary craftsmanship highlighting him. If you respect this remarkable person also, you will adore the aide we have for you! This bit-by-bit guide on the most proficient method to draw Ghost Rider will give you a lot of drawing thrills!
Stage 1 – Ghost Rider drawing
For the initial step of our aid on the best way to draw Ghost Rider. We will begin with what is perhaps his most conspicuous quality: his blazing skull head. For this step, you might need to zoom intently into our model picture, as we have many complex subtleties in the skull part of his plan.
His eye attachments will likewise have little circles within them for the eye impact we will tone later. You can involve a few wavy lines for the blazes around his head when you recreate the skull.
Stage 2 – Next, begin drawing his coat
During the second piece of your Ghost Rider drawing, we will begin drawing his notable calfskin biker coat. We will utilize a few adjusted lines that interface directly to the blazes around his head to draw the neckline and beginning of the coat. We will then involve straight lines for his shoulders to stretch out. And afterward, we will begin the arm of his coat too.
You can polish off this step by adding a few little spikes to his shoulders to make him look considerably cooler!
Stage 3 – Presently, draw his arms and chest
You’re prepared to draw a greater amount of his arms and chest in this step of our aide on the most proficient method to draw Phantom Rider. You can expand the arm on the left and afterward draw the initial segment of his chest utilizing a few straight and marginally bent lines.
His other arm will be bowed, so we will utilize parcels with more bent lines to make the kinks in his coat sleeve. There will be more spikes around his lower arm, and afterward, his clenched hand will grip a chain.
Stage 4 – Next, draw his other clenched hand
You’ve drawn one hand and lower arm for your Ghost Rider drawing. And we will add the other in the following stage. Like the other one, this lower arm will have a few spikes around it and prompt a shut, clenched hand.
He will likewise be holding a chain in this hand, and we will add more detail to that chain in the following stage.
Stage 5 – Presently, draw the chain and his belt
This subsequent stage of our aid on the most proficient method to draw Phantom Rider could take a touch of persistence. However, it will merit the work! We have previously drawn his hands holding chains; in this part. We will show the chain length between his hands. This could take a touch of persistence because the different connections should be drawn.
Then, at that point, we will polish off this step by drawing the two belts he is wearing. He should have an affection for spikes, as there are a few on his belts too!
Stage 6 – Next, draw his most memorable leg
We will polish off your Ghost Rider drawing by attracting his legs this and the subsequent stage. Until further notice, we will draw the leg on the left. His biker pants are very close, so we will use a few smooth, bent lines to draw this first leg. Then, we will polish off by drawing his boot at the lower part of the leg.
Stage 7 – Next, draw his other leg
This seventh step of our aid on the most proficient method to draw Phantom Rider will see you polishing him off by drawing his other leg. This one will look the same as the first, except it will be at a marginally unique point. When the two legs are drawn. Draw any foundation subtleties and extra characters you would like for this picture!
Stage 8 – Presently polish it off with some tone
At this last step of your Phantom Rider drawing, you can polish it off by adding a great tone to it. A touch of variety diverges from this person, as a large portion of his outfit is dimly dark. However, he has his flaring head’s radiant yellows and oranges at that point. We likewise integrated an orange onto his outfit to show the fire reflected.
We hued his eyes attachments in with dark and afterward involved orange for the little spots within them for a truly cool look.
One method for shading this is to utilize an additional strong medium like hued markers for his suit and afterward use watercolors for the blazes to make them look gentler.